diana_coman: that's where everything else should come from; so: what's the goal of this plan of yours?
whaack: diana_coman: The goal is to ensure I have what I need and know what to do in order to execute a timely, safe, and proper build of my computer.
whaack: safe means I don't open up the possibility of breaking something, and proper means I don't make a mistake that requires me to do undo a bunch of work to fix.
First we will ensure I have what I need to build the computer.1 Below is a list of all the tools, cables, consumables, screws, and parts I will use - with their location specified in a footnote.
Tools
- Screwdriver set2
- Small pliers (to grip hard to reach items)3
- Rechargeable compressed air sprayer4
- Flashlights5
Consumables
Screws
-
General Screw Package:11
- Thumb phillips screws M6 * 6 (10x)
- hexagon head phillips screws M6 * 6 (25x)
- Pan head phillips screws M6 * 6 (25x)
- Steel standoffs screws M3 * 5 + 7 (15x)
- Brass standoffs screws M3 * 5 + 7 (15x)
- Phillips flat head coarse thread screws M5 * 10 (15x)
- Phillips recessed truss head screw M3 * 5 (25x)
- Phillips recessed truss head screw M3 * 6 (25x)
- Insulation washers (25x)
- Extra 6-32 x 1/4" screws (100x)12
- Internal Fan Screws (4x)13
- Thumb screw for GPU (1x)14
- Screws for PSU (4x)15
- 4 Hand Screws for Tempered Glass Panel16
- 2 Thumb Screws for Back Panel17
Cables
-
PSU Cables18
- 24pin Mobo Cable (1x)
- 8pin CPU Cable (2x)
- 6pin / 2pin Split PCI-e Cable (3x cables, 2 connectors)
- SATA Cable (3x cables, 4x connectors)
- Molex Cable (1x cables, 4x connectors)
-
Monitor Cables19
- Power Cable
- HDMI Cable
- Display Port Cable
- USB 3.0 Upstream Cable
-
Case Cables20
- Front Panel Audio/Mic Jack Cable
- Front Panel USB Cable
- Four Front Panel Button / Lights Cables (+P LED, -P LED, POWER SW, RESET SW)
- SATA Cable for case lights
- Fan-to-motherboard cable (attached to fan) (2x)
- CPU Fan cable (attached to CPU heatsink) (1x)
- SATA 6Gbs cable (3x)21
- Ethernet Cable22
Internal Components
- Case Fans (2x)23
- Motherboard24
- CPU25
- CPU Heatsink26
- Graphics Card27
- Ram Stick (2x)28
- Primary SSD29
- Backup HDD30
SD Card ReaderI failed to purchase the right part. I ordered a card reader with the wrong bay size for my case. I will order a simple USB one through my mailing address.
Accessory Parts
Now that we have the full list of parts and where they are located we can map out a plan for building the computer. This is what is done so far:
1. The motherboard is screwed in.
2. The fan on the front-panel side is installed.
3. The CPU is locked into its slot on the motherboard.
The heatsink is currently attached to the CPU, but this was done for storage purposes. It must be unattached to apply the thermal paste.
I will first install all the parts, minus the GPU, then attach all the cables, and then install the GPU.35
0. Preperation (30min)
1. Clean and vacuum desk, setup good lighting, and remove all food/liquids from the premace.
2. Put cups/bins on desk to place screws in.
3. Comb hair and tie it in a bun (I have noticed I have dropped hairs into the case)
4. Charge air blower (Done night before)
5. Open case.
6. Do preliminary cleaning of the case with air blower.
1. CPU Installation (Estimated time: 1hr. The reason for the long time is because I need to make sure I can place the heatsink on the thermal-pasted CPU gracefully by first practicing the process a few times.)
Parts Used: CPU, CPU Heatsink (And later: CPU Power Cable)
First, I will apply thermal paste to the CPU with the one pea sized point method as recommended by Arctic, my thermal paste supplier. Then I will carefully attach the heatsink on top of the thermal pasted CPU.
2. HDD Installation (Estimated time: 10 min)
Parts Used: HDD + 4x Pan head philips M6 * 6 screws (And later: SATA cable to motherboard and PSU SATA Power Cable)
I will take out the mount from the case, and put the HDD in the mount. I will take care to think which of the two locations is the best position for the HDD, and also to consider how the SATA power cable will attach to the PSU as well as how the SATA Data transfer cable will attach to the mobo.
3. SSD Installation (Estimated time: 10 min)
Parts Used: SSD + 4x Phillips recessed truss M3 * 6 screws (And later: SATA cable to motherboard and PSU SATA Power Cable)
I will put the SSD on the bottom slot on the opposite side of the motherboard. Then I will screw it in by inserting the screws from the other side of the case into the SSD. The entry point for the screws can be seen in this picture. (I am using the SSD slot where in the picture 2 of the 4 screw holes are covered by the fan's power cable.) Just like the HDD, I will take care to consider how the two SATA cables will connect.
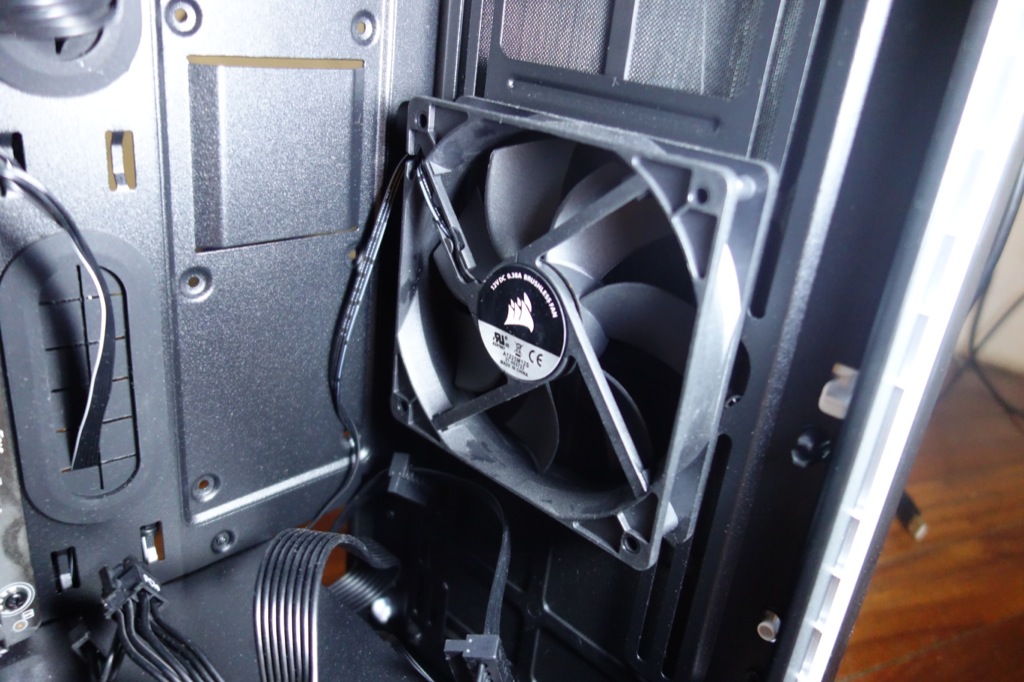
4. Ram Stick Installation (Estimated time: 4 min)
Parts Used: 2x Ram Sticks
I will carefully plop the two sticks into their slots, in the same place they were when I disassembled the machine.
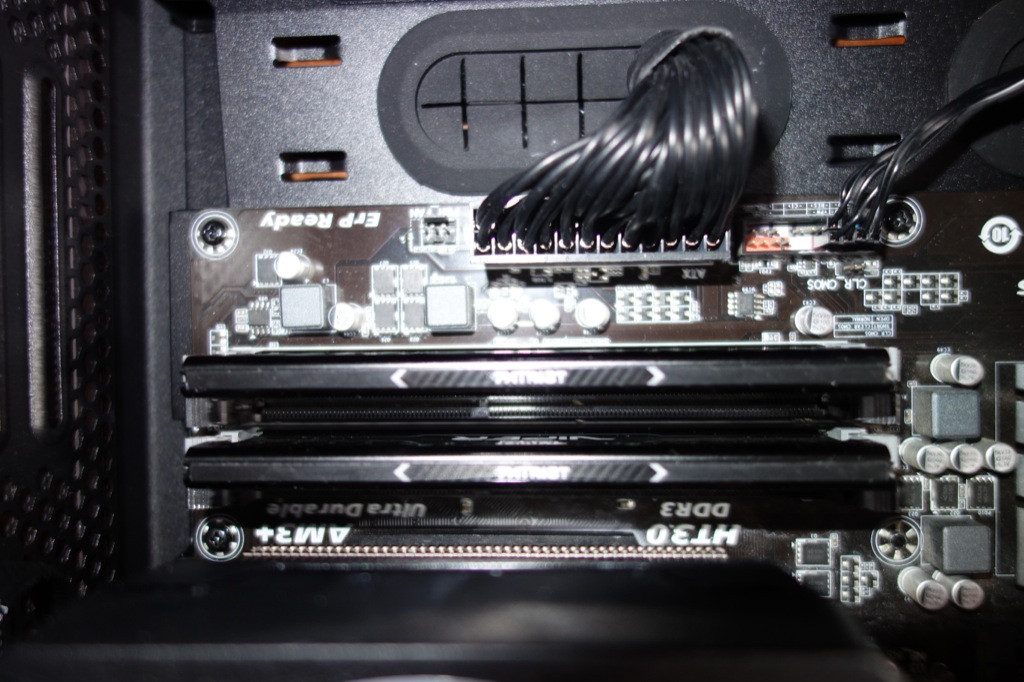
5. Upper Left Fan Installation (Estimated time: 6 min)
Parts Used: 4x Fan Screws, 1 Fan
I will screw in the fan as positioned in the top left of this picture.
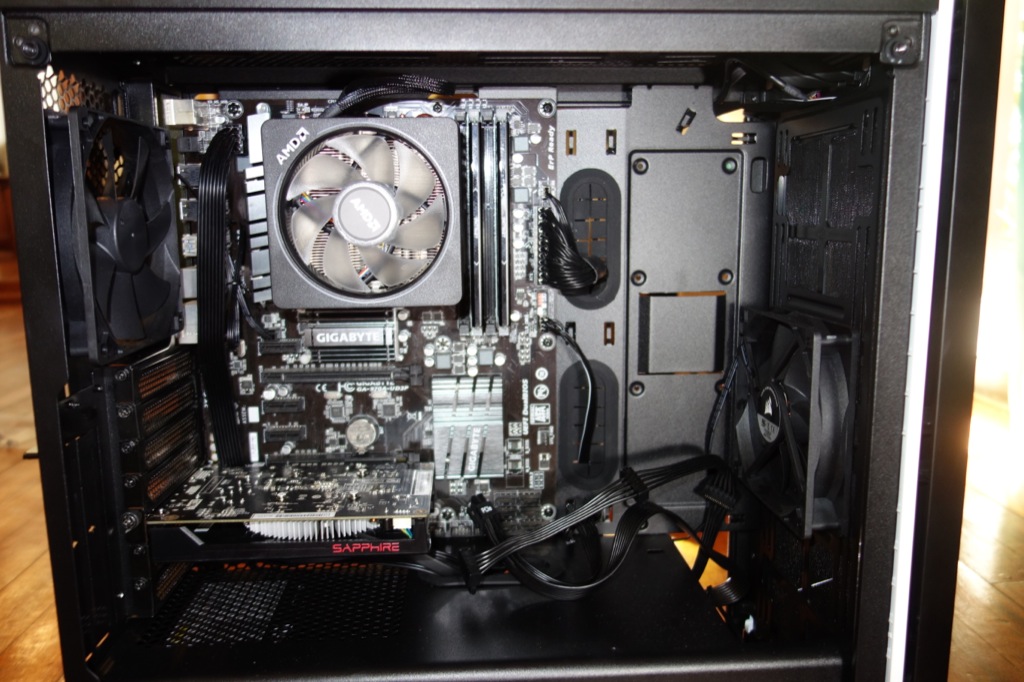
6. Plug Shit In (Estimated time: 20min)
The following cables will be attached more or less in the order listed:
Main 24pin MOBO Power cable
CPU Power Cable
Fan Power Cables (2x)
1 SATA cable from the PSU should connect to the case lights, the SSD, and the HDD.
SATA cables from HDD/SDD to MOBO.
All front panel cables (Audio/Mic Jack, USB cable, Power/Reset Button + LEDs)
PCI-e Power Cable for GPU
6. Graphics Card Installation (Estimated time: 8 min)
Parts Used: Graphics Card + 1 Thumb Screw
I will place the graphics card in the PCIe slot and then screw it in with the thumb screw.
7. Cleanup (Estimated time: 15 min)
1. Zip tie cables together.
2. Clean with compressed air again.
3. Close front and back case.
4. Place built computer under desk.
The next steps, outside the scope of this article, are to plug in the keyboard/mouse/monitor and install Centos + all necessary drivers.
- One missing item is the motherboard's IO Shield. This will increase the rate at which my computer collects dust. I was not able to find any shields from a preliminary search. [↩]
- Located on floor next to case [↩]
- Located on floor next to case [↩]
- Located on floor next to case [↩]
- Located on nightstand [↩]
- Located in PSU Box [↩]
- Located on nightstand [↩]
- Located under sink in bathroom [↩]
- Located under sink in bathroom [↩]
- Located in cabinet under coffee machine [↩]
- Located on floor next to case [↩]
- Located on floor next to case [↩]
- Located in parts-box in tupperwear containing fan [↩]
- Located in parts-box in tupperwear containing fan [↩]
- Located in PSU box in plastic box [↩]
- Attached to case [↩]
- Attached to case [↩]
- Located in PSU box [↩]
- Located under monitor or attached to monitor [↩]
- Already connected to case [↩]
- Located on floor next to case [↩]
- Located on desk. [↩]
- One located in case another located in tupperwear in parts box [↩]
- Already in case [↩]
- Already in case [↩]
- Already in case [↩]
- Located in protective sleeve inside parts-box [↩]
- Located in tupperwear in parts box [↩]
- Located in box on desk [↩]
- Located in box on desk [↩]
- Located on desk [↩]
- Located on desk under the monitor [↩]
- Located on desk under the monitor [↩]
- Located under the desk [↩]
- GPU Is installed last because it makes it harder/impossible to plug in certain cables. [↩]
[...] week I focused on planning. I wrote three relevant articles: my computer build plan, a review of the fleetbot the run, and an article on fleetbot's [...]